Shoebox/Tissue box Theater


I sourced this idea from Little Hearts, Big Love for my lesson plan, but of course changes had to be made to make this lesson more suitable for younger kids and busy parents. All you will need for this version is:
Materials w/ substitutions in parenthesis:
Old Shoebox
Colored Paper (markers + A4 paper)
Pencils/sticks of some sort - these can be reused, don't worry
Washi tape (normal plastic tape)
Scissors
Glue
Box cutters
Phone flash - for cinematic effect
🌟 Psst, the same tutorial applies if you are using a used-up tissue box, everything is just on a smaller scale!
Step 1:

Find a shoebox, preferably neutral toned, and use some box cutters (with the help of an adult!!!) to cut out two rectangles, as labeled in the visual above. SAVE the pieces you cut out as the base for your characters or props later! If you're using a tissue box, just use scissors to expand the rectangle already open for grabbing tissues; no need to make a separate hole.
Step 2:
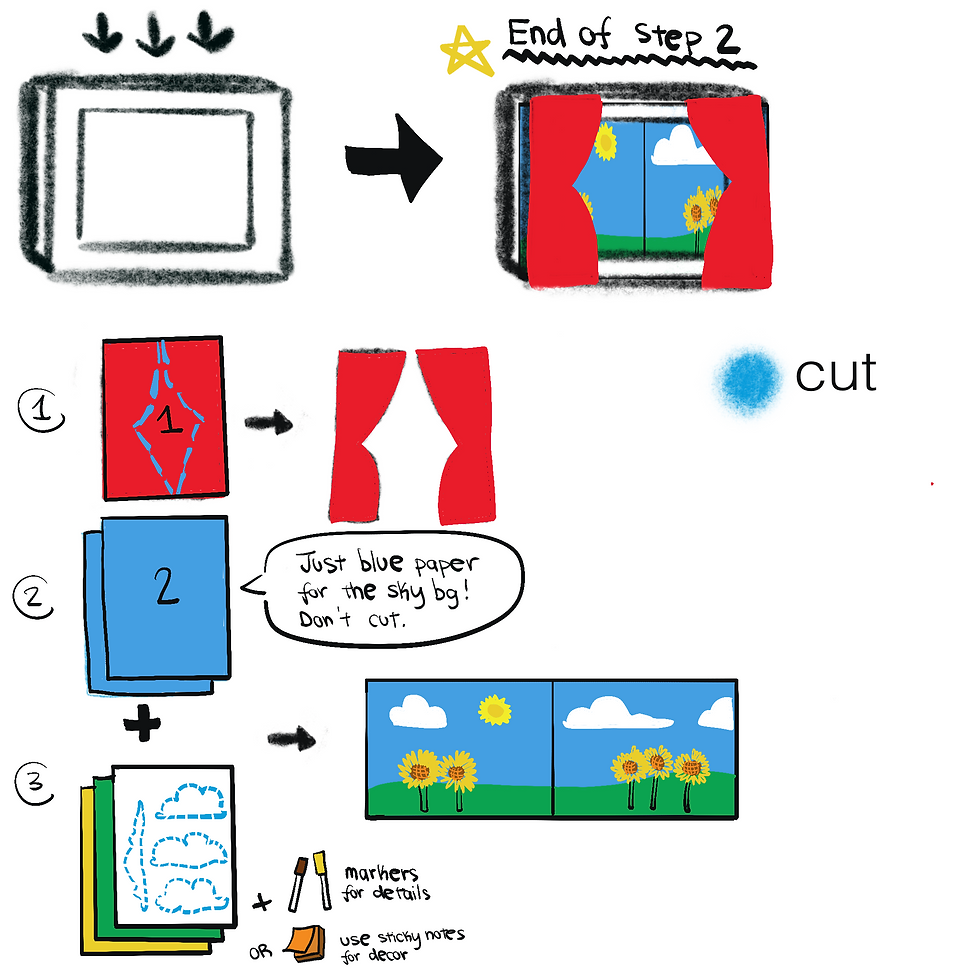
Optimally, you would have some colored paper on hand, but no worries if you don't! Grab a box of markers or even paint for larger areas, and color right on some white A4 printer paper (or even better, if you already have colored sticky notes for smaller parts!). I suggest outlining and coloring first before cutting out the elements needed to set up your landscape. The one I'm going for in this tutorial is a field of sunflowers, since in this class I wanted to teach the children about the crucial impacts bee pollination on our planet. Not a bad idea if you're also trying to add some environmental awareness tidbits to this fun activity!
Finally, once you have all your pieces, use a glue stick to attach it like shown in the picture, labeled the end of step 2.
Step 3:

For my character(s), I chose a little bee! For any relatively complex shapes like this, use the cardboard cutout scraps from earlier and just cut out a rectangle that holds your character, glueing the rectangle slip onto a rectangular piece of cardboard. Just like if you only used paper for your character, tape the figure to a pencil (or any stick really) with the stick inserted from the TOP of the character.
🌟 A super easy mistake to make is taping the pencil inserting from the bottom of the character, instead of the top, because the opening of the shoebox/tissue theater is at the top and you need to hold it that way!
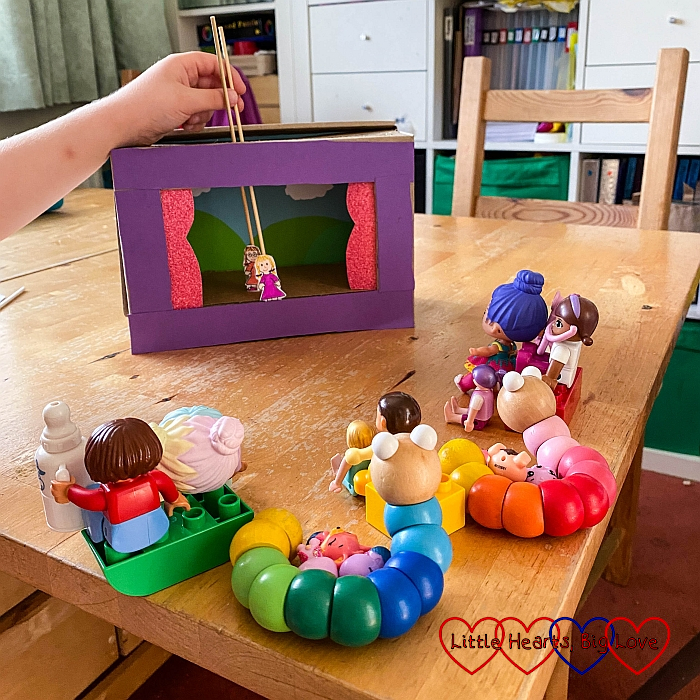
The end result should look something like this!! In my art class for kindergartners, I let the students take turn doing puppet shows with their own bees, and turning off then using flashlights, the classroom had a super cool ambience! I then showed them this cute YouTube video about the benefits of bees in our daily life.
Have fun and please drop a comment if you've tried this!


Comments